Blog

Liam's 2018 Camino Trip

If you call into Wild Side Sports, there's a good chance you're coming in to gear up for the Camino. With more Irish than ever undertaking the pilgrim routes, the Camino Frances has become an iconic walk that attracts keen walkers from around the world. It was something on my to-do holiday list for a while and so when Philip and Laurie wanted to send me over I jumped at the chance! I flew from Dublin to Biarritz on September 8th. 
I spent the first two days catching up with friends and surfing in Seignosse which helped loosen up the body for the walk ahead. I got a train from Bayonne to St Jean Pied De Port on the Sunday night and began my walk on the Monday morning. I finished up in Estella on the Thursday evening and managed to get a surf in San Sebastian on Friday before flying out from Biarritz on Saturday September 15th. Here is my account of the trip. 

Gear List : 

Total weight of kit with 3L of water was approx 13kg. 
This is the kit I brought with me for the Camino : 
  • Lowe Alpine Airzone Trek 35:45 L Pack
  • Columbia Peakfreak shoes 
  • Icebreaker socks 
  • Columbia Silver Ridge zip off pants 
  • Wicking t-shirts (Rab,Columbia) 
  • North Face Fleece 
  • Waterproof Shell Jacket 
  • Berghaus Deluge waterproof pants 
  • Rab Microlight Alpine Down Jacket 
  • Platypus 3l water bladder 
  • Beanie 
  • Buff 
  • Cap 
  • Underwear 
  • Quicksilver shorts 
  • Sandals 
  • Toiletry Kit (sun cream, anti - mosquito spray, bodyglide etc) 
  • Led Lensor Head Torch 
  • Spare laces 
  • Chargers and battery power bank 
  • Quick Dry Towel 
  • First Aid Kit (blister pack etc) 
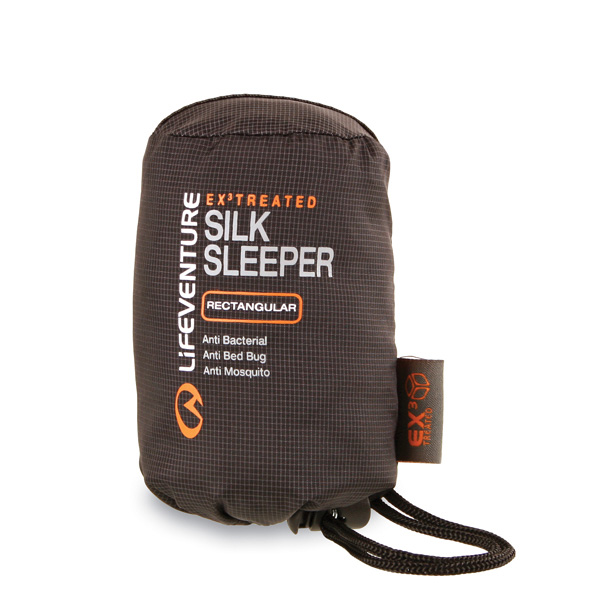
  • Thermal sleeping bag liner 

Camino Day 1 : St Jean Pied De  Port - Espinal (32 km) 6am - 2.30pm 

I left my hostel in St Jean at 6am with my gear fully ready from the night before. At this time of year it is still dark until about 7.30, which meant using my headtorch to guide me along the way. Monday was total mist and rain in the morning so I had my waterproofs on for a lot of it. This was a great time to get going as you can start the day early out of the midday heat. I had brought snacks to keep me going for the day and didn't want to wait around for breakfast at the hostel. As everyone had told me it is a steep first day and I wanted to get up to the top early. I got to Orrison just before 8am and had a coffee and a bite to eat there.
I continued on after a quick stop and made it to the top before 11 am. Unfortunately there was little views to be seen on account of the weather. I was glad for my waterproofs on day 1! On the way down I made use of the fountain and refilled my water bladder. Going through the forest route the sun started to come out which was a welcome sight! 
I got to Roncesvalles just before 12 and got my passport stamped. As it was a small village and I had nothing booked I decided to walk on to Espinal passing through the cute village of Burguete where I stopped for lunch. I arrived in Espinal and bunked down for the night in a super friendly hostel right by the mainstreet. 

Day 2 : Espinal - Arre (35 km) 6.30am - 6 pm

 
I started the day again in the dark with my headtorch going up a narrow tree lined path out of Espinal. As the light came up this area was really beautiful. This section was my favourite as the terrain is varied and there's lots of forests to walk through. The sun was strong this day and got up to around 30 degrees which meant I was drinking more water. I got to the town of Zubiri just before 10 am and had a rest and some food here. This was the biggest town I had seen in a while and felt more commercial than any other town so far. 
I walked on to Larrasoana and had lunch here where I tried the super tasty pilgrims meal. Every big stop like this I also changed my socks to keep blisters at bay. I was tempted to stay here for the night as the village was really nice with friendly people and good food but I decided to strike on towards Pamplona. As I walked on through the afternoon the weather again changed to eventually bring thunder and rain down. I reached the Trinidad De Arre 4km outside of Pamplona and decided to stay here overnight in the pilgrim hostel attached to the monastery. I slowed the pace this day to recover the legs and gave myself more time in each stop. It turned out to be a great place to stay as It had the feel of an old pilgrims shelter and was a great location to access Pamplona for the next day! 

DAY 3 : Arre - Zariquiegui (16 km) 8 am - 2 pm 

This day I used to explore Pamplona, a really gorgeous city and the most built up area you come to in your first week on the Camino. I walked in taking my time that day and used it as a rest day as well. The city has plenty of cafes, eateries and shops to keep anyone occupied.
After a few hours exploring Pamplona I left towards the town of Cizur Menor. I walked on up towards Zariquiegui. As you leave Pamplona it becomes a gradual incline and as you rise up you get fantastic views  back of the city. This section is very open with little shade and this day was hovering 30 degrees and above. I got up to Zariquiegui for lunch and decided to stop here for the night as the village had super views to enjoy and really friendly people. 

DAY 4 : Zariquiegui - Estella (35 km) 6.30am - 3.30pm 

Starting my last day I left again with the head torch on. Walking up to the sculptures at Alto Del Perdon you pass a series of windmills. The lights from Pamplona still shine bright as you head to the top. It really is a super view from the top of this hill as I could see where I had come from and where the path ahead of me would take me down into the next valley. I walked down this path until the village of Uterga where I got a breakfast and some welcome coffee ! After brekkie I headed on down and made it to Puente la  Reina  for 10.30 where I stopped for another passport stamp.
This section leading to Puente la Reina is big open rolling farmland, a very different sight from the day before. Leaving Penta la Reina you cross the town bridge and head on the track.There is a short uphill section through trees in this but no incline compared to the first day. I stopped in Lorca for lunch, this day was 27 degrees so not as hot as the others. I left Lorca and carried on towards Estella. From here to Estella it began as quiet countryside and the closer I got to Estella the busier it got. I reached my destination of Estella at 3.30pm and was happy to be able to chill for the evening before I headed for San Sebastian. Estella Is a lovely town with a big square which was a hive of activity in the evening time. It was the perfect place to end my Camino journey . 
September proved to be a great time to go mainly as the sun and heat were not at their strongest compared to July or August. My kit worked well for me, especially my shoes which are always a key factor on these trips. 
Another piece of gear I was happy to have with me was my water bladder as this meant I could keep going and not having to break the rhythm of walking just to keep hydrated. It is a 3 litre so once filled I never had to think about getting to the next fountain. My head torch was also essential to leave early in the mornings at this time of year which meant getting the bulk of walking done before the heat of the day sets in.
The trip was a super experience and I would highly recommend it to anyone wanting a good walking holiday or a personal pilgrimage .I know I will be going back to continue on the Camino, it really does become addictive .  Whether your considering the Camino for spiritual or personal reasons there will be something for you there, just get booking and BUEN CAMINO ! 

If you're thinking of embarking on the Camino pop into us at Wild Side Sports and we'd be more than happy to share our experience with you. 

Got a rip in your hiking gear? Check out these great repair products.

We've a great range of Repair and Maintenance products in stock at Wild Side Sports. Here are some of the best McNett products that every outdoor enthusiast should have in their tool kit. 

Seam Grip is amazing. It’s an award-winning repair adhesive that can keep you dry in any weather. It permanently seals the seams on your tent, pack and rainwear. It can repair rips, tears and holes in your equipment, too. It’s your all-purpose liquid tool in a tube. Ideal for on uncoated and polyurethane coated fabrics.

The McNett® GORE-TEX® Fabric Repair Kit is the only authorised repair kit for Gore-Tex based outdoor equipment and is an essential item for emergency repairs.
This Kit contains two adhesive-backed pressure sensitive patches made from original GORE-TEX fabric which provide a strong, flexible and water-resistant infield repair.

Easy-to-remove backing tape aids instant application or first cut to the required shape and size for repairs to holes, rips or tears etc. Repaired item can be used immediately and patches are residue-free should a more professional repair be required in future. Patches can also be ironed on to provide stronger adhesion and a more permanent repair. Patches are lightweight so can be easily stored in a wallet or back pack for later use. Suitable for fast, long lasting repairs to most Gore-Tex products and other technical breathable clothing or footwear i/e waterproof-breathable jackets, rainwear, trousers, shoes, fishing waders and camping equipment i/e backpacks etc.

Increase Visibility and reduce risk with this reflective fabric tenacious tape from McNett.Tenacious Tape Reflective Tape utilizes glass bead reflective technology to reflect light better than any coloured or fluorescent tape. Apply it on clothing, backpacks, footwear, bikes, vehicles or pet accessories etc. The ultra-aggressive adhesive sticks to almost any surface without peeling and the durable and waterproof fabric performs in both wet and dry conditions.

Last but not least is the famous Tenacious Tape

Tenacious Tape by Gear Aid is an all-purpose, weatherproof repair tape that fixes rips, holes and gashes in almost all of your outdoor gear. It stays put no matter what Mother Nature dishes out and leaves no sticky mess. Tenacious Tape comes in black, clear and popular colors, so you can match your fabric for nearly-invisible repairs. Wait 24 hours after application and you can machine wash or put it in the dryer without worrying that the repair tape will peel off.

If you've any questions, or need some advice on how to repair your gear, our staff will be delighted to help you!


MSR COOKERY WORKSHOP WITH EXPEDITION CHEF KIERAN CREEVY

WHEN: THURSDAY 24TH MAY AT 6.30PM

WHERE: WILD SIDE SPORTS, BANDON

HOW MUCH: €10

REGISTER: EMAIL INFO@WILDSIDESPORTS.IE OR CALL 023-8829706

Sick of cooking the same old things on every camp trip? Bored of beans and want to expand your bonfire recipe repertoire? Then learn to camp cook from a Pro at the Wild Side Sports MSR Cookery Demo with expedition chef Kieran Creevy.

Kieran is an expedition and private chef and International mountain leader with more than 20 years experience cooking and leading in a wide variety of countries and on vastly differing terrains and climates around the world.

He's cooked a 6 course tasting dinner with matched wines from a basecamp tent, prepared homemade pumpkin and sage gnocchi with wild boar râgu at an overnight snow-hole camp in the Italian Alps and served reindeer loin with smoked beetroot, skyr and pine needle salt in the Arctic.

You'll also get a chance to cook on MSR stoves and rumour has it that he even uses dry bags to get bread to rise! 

If you want to come along it's €10 on the night (for food and ingredients) and we'll have some wine and nibbles too. Places are limited and you must book in advance so please register by emailing us on info@wildsidesports.ie or ring us on 023-8829706


NEW BRAND klean kanteen

We're delighted to introduce another new brand to Wild Side Sports. If you've spent some time in the States you're sure to have across KLEAN KANTEEN, they make super water bottles and work hard to design durable, versatile, affordable products that replace mountains of single-use waste—and last a lifetime.

We've started off with a small enough range to see how it goes but we think there are some interesting options here. 

CLASSIC BOTTLES - VACUUM INSULATED - 1900ML

At a full half gallon the Insulated Classic 64oz (1900ml) is the largest insulated stainless steel water bottle we've ever stocked, perfect for long trips and serious hydration needs.

This beauty comes in at a whopping 12.5" high! It also costs a whopping €63.....

  • Double-Wall Vacuum Insulation, Keeps Hot up to 30 hours, Keeps Iced up to 100 hours
  • Food Grade 18/8 Stainless Steel Construction
  • Comes with Leak Proof Loop Cap

VACUUM INSULATED COFFEE CUP - 473ML - €32

This Coffee Tumbler comes in four colours, blue, red, purple and green. It's constructed with high quality stainless steel and rigorously tested double-wall vacuum insulation, the 16oz (473ML) Insulated Wide will keep drinks hot for 10 hours and iced for 30 hours. Comes with leak proof Café Cap 2.0 which keeps drinks safely contained, spill free and has easy clean construction.

REFLECT SINGLE WALL STAINLESS STEEL/BAMBOO BOTTLE - 800ML (€34)

The stainless steel Reflect 27oz (800ML) water bottle is beautiful in its simplicity and deliberate in its design. We took our original Classic 27oz stainless steel bottle and made it plastic free, paint free and a truly beautiful all stainless steel water bottle. Crafted using sustainable harvested bamboo, stainless steel, and food-grade silicone. Just three materials united into the ultimate expression of Klean. The full stainless bamboo cap is crafted from one piece of stainless steel and topped with sustainably harvested bamboo. It creates a full stainless steel interior so your water and other favorite beverages stay fresh and delicious. We laser engrave our logo and the bottom is embossed to keep the bottle paint free.

Also available in a smaller 532ml version for €28

TUMBLERS - VACUUM INSULATED - 473ML -€25.00

The stainless steel Insulated Tumbler 16oz (473ML) will quickly become your go-to cup, easily transitioning from morning coffee to afternoon smoothie to nighttime beer. Our high performance double-wall vacuum insulation will keep drinks hot for 4 hours and iced for 20 hours. We electropolish the interior, a safe and non-toxic process, to make it easy to clean. Our included Tumbler Lid keeps splashing to a minimum and fits all our Insulated Tumblers and Steel Pints (16/20oz). Perfect as an alternative to disposable paper cups. 

All of these great products are available to buy on our website - click here

10% of Sales to go to Bandon Community Hospital Fund

We have decided that Black Friday isn't for us in Wild Side Sports so last year instead of participating in the craziness we donated 10% of our sales on the day to a local charity. We're going to do the same again this year and this year our chosen charity is the Bandon Community Hospital. Friends of Bandon Community Hospital are currently fund-raising for a new day room. You can find out more here.  http://friendsofbandoncommunityhospital.com/

New Winter Products from Rab

Rab are one of our favourite brands for insulation. Their down jackets are great quality and really nice on. Innovation is key to what they do and you'll see lots of new materials like Polartec Alpha being used across the range. This is just an overview of what's come in over the past few weeks. There are more pieces in store and on the website.

Men's Microlight Alpine Jacket: €215

143g (large) of 750FP Hydrophobic Goose Down provides exceptional levels of warmth without compromising on weight. A Pertex® Microlight outer fabric helps to keep the warmth in and is both breathable and windproof. Key technical features include a down-filled hood and YKK® zipped pockets throughout.

Women's Microlight Alpine Jacket: €215

The Women’s Microlight Alpine Jacket is one of our signature pieces, with a moulded polymer peaked hood, elasticated cuffs and a separate stuff sac. A mini stitch-through baffle construction and a minimal, uncluttered design make the Women’s Microlight Alpine Jacket a perfect layering piece for alpine climbers, or an adaptable stand-alone jacket for day-to-day use.

Men's and Women's Microlight Vest: €147.50

A mini stitch-through baffle construction and a minimal, uncluttered design make the Microlight Vest ideal for use as a layering piece for alpine climbers, or an adaptable stand-alone vest for day-to-day use.

Men's Flux Pull On - €66.50

The Flux Pull-On is a mid-weight, zipped pull-on with a brushed back providing quick drying warmth, designed for use as a cold weather baselayer.

Men's Flux Pant - €57.50

The Flux Pant features a low bulk, moisture wicking, elasticated waistband and a slim fit, ensuring the pants remain comfortably in position when layers are added.

VR Guide Jacket - €239.95

As the weather turns and temperatures drops, our Vapour-rise™ Guide Jacket is ready to take on everything from winter alpine climbing to hill walking. Known for its warmth and durability, the high wicking Polartec® Alpha lining offers excellent breathability and a fantastic warmth-to-weight ratio.

On the outer, the hard wearing Pertex® Equilibrium® and reinforced panels are accompanied by a helmet-compatible hood, roll-down velcro tab and storm flap all providing essential protection from the elements.


Women's Nucleus Hoody - €72.50

The Women’s Nucleus Hoody is a lightweight fleece pull-on, in a high stretch fleece fabric for active use within a layering system.

A grid back and a form-fitting stretch design lend the Nucleus Hoody for use as an outer-layer when climbing or hill-walking in warm conditions, or underneath a larger layer in harsher conditions. Technical features include an under-helmet hood, Polygiene® STAY FRESH odour control treatment and a sleek clean design with only one zipped chest pocket.

Men's Nucleus Pull-On - €72.50

The Nucleus Pull-On is a light-weight, two-tone fleece in a high-stretch double knit fabric for use as a mid-layer in colder conditions.

A comfortable double knit fabric means that the Nucleus Pull-On can be worn as a baselayer in colder winter conditions. Key features include a high collar, Polygiene® STAY FRESH odour control treatment, and a YKK® deep venting chest zip and chin guard.

Women's Paradox Full Zip - €142.50


Designed to be worn as part of a layering system in cold climates or by itself in warmer conditions this insulated jacket is extremely versatile. Lightweight and highly packable the Paradox Pull-On uses the innovative Polartec Alpha insulation - a highly breathable fabric that quickly wicks away any sweat. 

Perfectly partnered with Motiv, a light and quick drying outer material, you'll find extra layers move easily over the Paradox without catching. Warm and extremely comfortable to wear it's easy to see why the Paradox Pull-On is indispensable to climbers, hikers and mountaineers alike.

Men's Paradox Pull On - €133.50

The Paradox Pull-On is an innovative and extremely breathable, light-weight mountain pull-on, designed using the lightest Polartec® Alpha™ insulation.

Women's Firewall Jacket - €260

The Women’s Firewall Jacket is a fully featured, stretch waterproof jacket in a breathable Pertex Shield® + 3-layer fabric, ideal for active year-round mountain use.

Men's Firewall Jacket - €260

Using an innovative new venting system, including full-venting YKK® AquaGuard® Escape Artist™ pit zips, the Firewall Jacket offers complete protection in wet environments, whilst the stretch fabric and highly breathable design provides high levels of comfort when active. Technical features include a helmet-compatible hood and a regular fit to comfortably allow layers underneath.

Storm Glove - €53.50

The Storm Glove is a new waterproof and synthetic insulated glove using Porelle® fabric and Pyrotec™ insulation, designed for year round wet-weather use.

A durable 4-season glove, it features a goat leather palm and thumb reinforcement, a soft bemberg lining and a single hand drawcord cuff closure. Whether you are practising winter nav or negotiating the peat bogs of Kinder Scout, the Storm Glove is a reliable choice to see your hands through the winter months.

Mens and Women's Powerstretch Pro Grip Gloves - €31.50

The Power Stretch Pro Grip Glove is a light-weight and quick drying glove, made using Polartec® Power Stretch® Pro™ fabric, designed for all around use in variable conditions or as a low bulk liner glove.

Men's and Women's Ridge Glove - €44.95

Offering warmth and protection in equal measure, our Ridge Gloves have a smartphone compatible finger and thumb making them both dexterous and practical. 

Designed to allow you to use your GPS, camera or smartphone on the hill, the Ridge Gloves bridge the gap between technical and non-technical handwear. 

With a durable wind and water-resistant outer with a fleece-lined inner and quilted leather palm these gloves are warm and hard-wearing giving you good grip when using trekking poles and handling equipment.

Neck Shield - €26.95

The Shadow Neck Shield is a stretch fleece neck gaiter, with zoned windproof panels to protect the face area from cold, harsh conditions.

The bulk of the Shadow Neck Shield is made from Polartec® Power Stretch® fabric, providing high levels of breathability and wind resistance. Further versatility and protection against icy blasts comes from the Polartec® Wind Pro® fabric panel around the face area.

Rab Logo Beanie - €18.50

The Rab® Logo Beanie is a light-weight, knitted beanie with an internal fleece headband for warmth and comfort.


That's it for now. More to come. Call in-store for more details. 

RESTUBE SWIM

It's that time of the year when you're back in the water.  If like me, you can get a bit nervous when you go too far out of your depth or if you're working hard to built up your distance and want a safety blanket then you should consider Restube.

For those of you unfamiliar with Restubes they are an inflatable device that you wear (deflated) in a pouch around your waist. They come with Co2 cartridges and if you get in trouble you pull the cord and inflate the tube (see video). You then swim the buoy back to shore, deflate the buoy, pack it up and replace the Co2 cartridge with a fresh one. A two pack of spare Co2 cartridges cost €8.99.


Today I'm introducing you to the the Restube Swim which is the newest and most advanced product in the range but you can check out the full range of Restubes here (there are cheaper options!) https://wildsidesports.ie/collections/restube

Restube Swim is the lightest Restube in the range coming in at just 210grams. 

One of the issues with previous iterations of Restube was that they tended to move around during longer swims. The new Restube Swim comes with a removable RESTUBE active stick. With the active stick it is easier to position the Restube and prevents it from shifting during long distance swims.

Restube Swim also won the prestigious ISPO Gold Award. Here's what they had to say about it:

"RESTUBE is the airbag of watersports. Pull the trigger and RESTUBE inflates within seconds. The “RESTUBE swim” version is the most compact version ever designed, matching highest durability and quality standards with less drag and great comfort. Specifically made for all swimmers. Whether you're training for the next Ironman or just having a good time at the lake. You will feel more freedom and have an even better time around the water.

Jury statement: The logical evolution of the Restube – versatile, space-saving, and easy to use, to name just a few of its benefits"

If you're interested in finding out more about Restubes pop into the store. Our staff have tried them out themselves so can give you lots of tips. The Restube Swim costs €85 and the Restube Classic is €59.95.  They're available to buy here:

https://wildsidesports.ie/collections/restube 


Our Portuguese Camino: Day 2 Redondela - Pontevedra (21km)

We had a pretty good night's sleep until about 6am when I woke up to the distinctive hum of a mosquito. Groan.. We'd left the window open and had been joined during the night by a couple of hungry mozzies. I naively hoped I hadn't been bitten but luck wasn't on my side and by that afternoon I could count 25 bites. Luckily for Phil I barely mentioned the itchiness! ;-) After two days he'd a system in place where he fined me a €1 every time I moaned about them. Chancer!

So...back to the point. The nice people in Torres Agrello dropped us onto the Camino after a hearty breakfast. It was a gentle enough stroll out of Redondela, under a rail viaduct, alongside a busy road through forest track - so a nice mix of terrain. 

Arcade is lovely, very picturesque and would make a great alternative stop to Redondela, although it is about 6/7km further on than Redondela.  Our book (John Brierley) said that there were some places to swim in Arcade.

There is a little river-side beach in Arcade but we didn't think the water looked very enticing so we gave it a miss. Maybe there's another spot we missed.  Nevertheless we stopped in Arcade for our morning coffee in the little place on the far side of the Pontesampaio bridge over the Rio Verdugo and it was perfect.


There was a steep enough hill coming out of Arcade but it didn’t last long.

The rest of today’s walk was a mix of quiet roads and pathways. We took the alternative route into Pontevedra to avoid the busy main road. This was delightful, easy terrain alongside a small river and beneath trees.


Finally we passed underneath this bridge and arrived into Pontevedra.

There is quite a long walk into the old City so don’t be disheartened by the outer edges of the town. Once you get into the older part it’s lovely. In fact I believe the city was to hold a Medieval Festival the following weekend. We met other Peregrinos later in our trip who had been there for it and said it was great so that could be worth looking out for.

We stayed in Hotel Boa Vila. The staff were kind and courteous and our room on the 3rd Floor was perfect for the price we were paying. The main bonus of this Hotel is it’s central location; it’s in the heart of the Medieval area.

We ate lunch in a Tapas/Wine Bar called Boavina Enoteca and I’d highly recommend it, the food was delicious.  

There’s lots to see and do in Pontevedra, explore the medieval centre (Barrio Antigo), have a beer in the Praza de la Peregrina, visit the 19th century Sanctuario de Peregrino, etc. The Museo de Pontevedra was closed but it sounded like it would be worth a visit. There’s loads of little squares to sit down and sample the local tapas and wine – which we did! All in all we had a lovely evening in Pontevedra.


Our Portuguese Camino: Day 1 Tui to Redondela

How we got there: We flew with Ryanair from Dublin to Porto, overnighted in Porto, spent the following morning sight-seeing in Porto then took a lunch time bus from the Bus Terminal in Porto (Casa Musique, Goeuro Bus - €36 including taxes for the two of us) to Tui. Duration: 2 & 3/4 hrs. 

When we went: Early September 2016. The weather was unseasonably warm with temperatures averaging 30°C.

Tui

We arrived in Tui and walked the 1.5km to our hostel, Hostal Albergue Villa San Clemente, where we had booked a private room for €40 (for two). The room was fine, no air con - just a very noisy fan (not a super night's sleep) and we shared a bathroom with two other rooms.

We had a lovely time exploring Tui. It's a beautiful town on the Mino River with lots of nice bars, parks and cafes. 

We had drinks in a funky bar called Bar Central and ate in a restaurant just around the corner from the Cathedral. All very good. 

Anywhere to swim?

River Minho

We saw people swimming in the river and also spotted what looked like a public pool in the main park. There was a small 'dip' pool in the garden of our hostel. 

Credencials:

We picked up our Credencials from the Cathedral in Tui. We had read on-line that you could only get credencials up until 2pm but we arrived at 5pm and had no problems. They cost us €2 each. 

Day 1: Tui to Redondela (took us 34.8km and 7.22 hours)

Our first day on the Portuguese Camino...in Spain! Up and on the road for 8.15am. It was a beautiful morning and 20°C already. The first few kms were off-road, walking along a forest path.

Underfoot it was a mix of gravel path and we walked over this beautiful stony bridge. 

After about 10km it started to get busier. We hadn't had food yet and our stomachs were rumbling so we stopped at a roadside cafe beside a busy factory a few kms outside Porrino. Breakfast consisted of a tasty roll with serrano ham, coffee and juice and it hit the spot. 

In your guidebooks there is a lot of talk about the industrial estates on the way into Porrino but now you can bypass that. There are lots of signs indicating a detour that enables you to avoid the section into Porrino that takes you through the industrial areas. We chose to take the detour and it was quite pretty, walking along the rio Louro and through woods again. 

Porrino is a popular place to stop for a lot of people. However we had chosen to walk on to Redondela so we walked straight through Porrino. The Old Quarter looked quite pretty but no where was calling to us as a lunch spot!

By lunch time temperatures were up at around 30degrees...hot!

The next stretch from Porrino to Redondela was a lot of road and concrete footpaths. Not so nice and quite monotonous.  We eventually arrived in Mos which was a lovely surprise. Cute little village with a super cafe (the first one you see as you come into the village). We stopped here for lunch and enjoyed a delicious tortilla, patatas bravas and a tasty beer.  There was a beautiful view down through the valley and off to the east. 

Onwards, we had about 10km to take us to Redondela. There was a solid uphill out of Mos and then a steep down hill to Redondela which was hell on the knees. 

Redondela seemed quite nice but we had booked a hotel about 5km outside the town so apart from a quick stroll around and a post-walk beer we didn't get much time to explore the town properly.

We were staying in Pazo Torres Agrelo which is a beautiful old estate.  The staff from Torres Agrelo very kindly picked us up in the town centre which was super handy.  We checked in and were shown to our room which was lovely, it had a bath, a comfy bed and best of all it overlooked the pool which we promptly hopped into! Such joy after a long hot day!

We had pre-arranged that we would eat in the hotel  which was a good decision as we were too far to walk into town.  The meal was very good.  It was a set menu so no choices but all courses suited our palettes. Delicious breads and olives to start, then scallops served in a sort of curried carrot puree. Followed by monkfish and pepper kebabs which were really tasty. Dessert was the only let down, a local delicacy of a dry sponge with whiskey poured over - interesting though. 

That night we stupidly left the window open and Laurie got destroyed by the Mozzies....25 bites...not that she counted. So top tip - CLOSE THE WINDOW. 

Our dinner, b&b cost €130 including wine and an after-dinner drink - for the two of us. That was great value compared to Irish prices.

Packing for the Camino

camino collage

This year we're in the process of packing for our third trip on the Camino. This time for a change we're heading to the Portugese Camino and I thought it was a good opportunity to repost this blog.

_____________________________________

Originally posted Sept 2014. 

The hardest part of the Camino isn’t the 25km you walk everyday, nor is it the snorers in the Auberges or the fear of bedbugs …the hardest part is spent at home trying to decide what to pack. Basically, (and this isn’t a good thing for a retailer to say) you don’t need much but what you do bring needs to be light and hard-wearing, particularly for all you hard-core Peregrinos who are doing the full journey.

(This is a blog post, prices are correct at the time of posting but are subject to change).

My Pack

image (3)

Before I get into what I packed, I’ll show you the bag I used. I chose the Lowe Alpine Airzone Pro ND (stands for Narrow Dimension i.e. lady fit) because it has heaps of access points. You can get at your stuff from the top, from the bottom and from a horseshoe opening at the front. It also has an excellent back system with pockets on the hip belt and shoulder straps.  It holds 33-40L and it was carry-on compatible. Perfect bag! Costs about €120 (update the new and improved version now costs about €147.50)

airzonetreknd36031_naQLIAW-480x48013934_full_17fae12ccfc07b37

When we traveled and how much we did

We (my husband Philip and I) only had a week off from our shop, of which four days were spent walking. We started in St Jean Pied de Port and reluctantly left the Camino in Puente La Reina. It was the start of September and it was gloriously sunny. You’ll carry the same for a week as a month – just end up doing more washing en route. You should aim to keep your bag at a maximum weight of 7/8 kg for women and 9/10 kg for men and remember you will be carrying 1L to 2L of water which equates to another 1kg/2kg of weight.  The lighter the better.

My List

Clothing

  • Walking Shoes
  • Two Technical T-Shirts
  • A Pair of Convertible Pants
  • A Pair of Shorts
  • A Warm Layer (in my case a light down jacket but a fleece would have sufficed)
  • Underwear (3 knickers, 2 sports bras – 3 pairs of boxers for guys)
  • Socks – 2 good pairs (bring 3 if doing longer than we did)
  • Something to sleep in (boxers and t-shirt for guys, sleep shorts and t-shirt for girls)
  • 2 x normal t-shirts for night time
  • A pair of flip flops/light comfy shoes for night time
  • A hat
  • Waterproof jacket
  • Waterproof pants

Other Stuff

  • A sleeping bag liner or light sleeping bag. (we brought liners, mine was silk, Phil’s was cotton – both fine)
  • A travel towel
  • A head torch (didn’t use but would probably be handy if you were staying in the Auberges a lot or setting off very early in the morning)
  • 2 x Stuff Sacks to pack everything in
  • A book

Wash Bag

  • Shampoo
  • Deodorant
  • Sun Tan lotion
  • Shower Gel/Face Wash

First Aid Stuff

  • Compeeds….(only 5 in a pack so bring 2)
  • Stuff for dodgy stomachs
  • Painkillers
  • Insect Repellent – although we didn’t end up using this when we were there

Exactly what we packed

Walking Shoes

The toughest choice you’ll make is what shoes to bring. I would recommend a hiking shoe or a mid (a low, light boot).  I went for a pair of Merrell’s – Siren Sport GTX which I have had for years and which are one of the best sellers in our shop.  You are looking for something light, with a solid sole that will give you stability on uneven surfaces. I felt it was important that they were waterproof but some people would disagree on this because a waterproof shoe is warmer to wear than a non-waterproof one.  To me the thought of having wet feet was more off-putting than the thought of having hot feet and to be honest I didn’t find them particularly warm so I was happy I went the way I did (even though we didn’t get any rain).  Philip wore a pair of Salomon trail runners which weren’t waterproof. They were lighter and more flexible than my shoes. He found them good but on the very rocky sections he was feeling the stones more underfoot than I was.

Siren Sport GTX - €118.50

Siren Sport GTX – €118.50

Two Technical T-Shirts, which I rotated and used every second day. 

I chose Merino Wool (Icebreaker – €54.99) because they don’t get smelly. Icebreaker merino resists odour naturally, and can be worn for days – even weeks – without washing. To test it out, Phil wore one t-shirt for four days and it was still passing the sniff test on day 5!

Icebreaker Tech T Lite - €54.99

Icebreaker Tech T Lite – €59.99 (that’s not me unfortunately)

A Pair of Convertible Trousers

Columbia do great Convertible pants. Their Silver Ridge Convertible Pant is very light, doesn’t crease, is comfy and basically ticks all the boxes.

Silver Ridge Convertible Pants - €59.95

Silver Ridge Convertible Pants – €65

A Pair of Shorts

Again, I chose Columbia here. Quick drying with lots of pockets and in this snazzy beige colour (see below pic) they go with just about everything…plus Phil had a matching pair – twinsies! Silver Ridge Cargo Short – €44.95

Matching Shorts - the key to every successful marriage

Matching Shorts – the key to every successful marriage

A Warm Layer

I borrowed a very fancy light weight down jacket off my sister but a fleece would be fine. I’d recommend something light but warm – so anything made out of Polartec would be perfect.

Helly Hansen Daybreaker Fleece - 1/2 Zip - €43.50

Helly Hansen Daybreaker Fleece – 1/2 Zip – €43.50

 Underwear

You can reduce the amount of underwear you need to bring by choosing technical fabrics over cotton. The problem with cotton for this kind of thing is that when it gets sweaty, it stays damp for a long time. You need to chose a quick dry sport fabric – like LIFA from Helly Hansen or Merino wool from Icebreaker (that’s what I brought).

Socks

Two recommendations for you here.

1000 Mile Approach Sock - €14.50

1000 Mile Approach Sock – €14.50

The 1000 Mile Approach Sock is designed for maximum comfort with hiking shoes. The 100% Tactel® inner layer stays with the foot, wicking away moisture, whilst the soft wool-mix outer layer moves with the shoe.

The lack of friction between the layers helps to prevent blisters and reduces wear.

I thought these were fab. Just make sure you take your time putting them on in the morning to get the layers sitting right.

Icebreaker Hike Lite - €16.50

Icebreaker Hike Lite – €16.50

These are Philip’s choice. All the benefits of Icebreaker Merino wool combined with a supportive foot bed and reinforced toe box. If you get two pairs and rotate them every second day you’d be amazed how long you get out of them.

Waterproof Jacket and Pants

Thankfully we had great weather and didn’t need to use these but what you are looking for here is something super light.  A lot of people choose Ponchos but having spoken to a couple of people who went the poncho option they wouldn’t recommend them as they blow in the wind too much to be truly useful in heavy conditions. If you can afford, it the creme de la creme of lightweight waterproof gear is Goretex Paclite and the brand I’d choose is Berghaus. Berghaus Paclite Pants cost €120 and the jackets cost about €250.

Berghaus Paclite Pant - €120

Berghaus Paclite Pant – €120

With jackets there are lots of cheaper alternatives, you can get a nice light waterproof jacket from the North Face for about €100 and less from other brands.  A cheaper alternative is something like Mac in a Sac. Not as good but will get you through a shower and they are lovely and light.

The North Face Resolve Jacket - €100

The North Face Resolve Jacket – €100

Mac-in-a-Sac Classic Jacket - €31.99

Mac-in-a-Sac Classic Jacket – €31.99

Packs up into a handy pouch

Packs up into a handy pouch

Hat

A good hat with a wide brim is essential for during the summer. Never in my wildest dreams did I think I’d spend over €80 on a hat until I came across Tilley hats but I’m glad I did because they are the most comfortable, useful things ever. They float, they come with a lifetime warranty, UV50 protection, if you lose it within the first two years they’ll give you a new one for half price. The list goes on.

Tilley Hat's Rock

Tilley Hat’s Rock – €83.50

See how happy my Tilley hat made me?

See how happy my Tilley hat made me?

If you don’t feel like spending that kind of money there are plenty of other good hats from brands like Berghaus, Columbia and The North Face

The North Face Suppertime Hat - €29.99

The North Face Suppertime Hat – €29.99

Sleeping Bag or Sleeping Bag Liner

A sleeping bag or sleeping bag liner is essential if you are going to stay in the Auberges. Some of the Auberges have blankets – some don’t. For example the monastery in Roncesvalles doesn’t provide blankets, so I slept fully clothed in my liner and was just about warm enough. The joy of liners are that they are so light – especially the silk ones. However, only you know how warm you need to be at night to sleep comfortably.  This bag from Snugpak is a good option if you want to bring a sleeping bag because it is small and tidy. It still weighs 850g though….but it is treated with anti-bacterial stuff to keep those pesty bed bugs away.

Snugpak Travelpak 1 - weighs 850g - €43.50

Snugpak Travelpak 1 – weighs 850g – €43.50

As I said above, we chose to carry sleeping bag liners because we stayed in Pensions (little Guesthouses) on some of the nights.

I carried a silk liner which will keep you warm when it’s cold and cool when it’s warm. The silk has been treated to be antibacterial, anti-mosquito and anti-bed bug. It also hides a security pocket inside.

Lifeventure Silk Sleeper - weighs 150g - €56.99

Lifeventure Silk Sleeper – weighs 150g – €56.99

Phil carried a cotton sleeper which also had the EX3 triple layer of protection which prevents bacteria, mosquitos and bed bugs.

Lifeventure Cotton Sleeper - Weighs 337g - €24.99

Lifeventure Cotton Sleeper – Weighs 337g – €24.99

Travel Towel

A travel towel is an essential piece of kit as you won’t have space in your bag for a regular towel nor time to wait while it dries.

Again we went with Lifeventure products here. Prices range from €18.50 to €30ish, basically the more expensive they are the more absorbent and faster drying they get.  We chose MicroFibre, the most traditional of the trek towels, this one offers a little more comfort while you’re away. It dries six times quicker than a beach towel and absorbs seven times its own weight in water. It packs down neatly into a compact ripstop carry case.

Lifeventure MicroFibre Trektowel - Size XL - €29.99 - weighs 350g

Lifeventure MicroFibre Trektowel – Size XL – €29.99 – weighs 350g

Headtorch

I chose this one from LED LENSER because for €29.99 you get 90 lumens (which is very powerful for that price), however I didn’t use it once so I won’t bring it next year.

LED LENSER - €29.99

LED LENSER – €35

Stuff Sacks

I think these are essential for use with a rucksack because it allows you to pack quickly, unpack quickly and access your stuff easily.  I always put underwear in one stuff sack, clothes in the other and the third for night time stuff like chargers, sleeping bag liner, headtorch, etc.  Three stuff sacks weigh just 90g.

Stuff Sacks - very handy - €24.99

Stuff Sacks – very handy – €24.99

What I didn’t bring that I should have….

I was pretty happy with my packing but one thing I wish I had brought was a small packable rucksack for use at night when you’re out exploring or going for dinner. Something like this one from Ticket to the Moon would have been perfect.

Weighs very little and packs up very light

Weighs very little and packs up very light

Ticket to the moon rucksack - €19.99

Ticket to the moon rucksack – €19.99

So that’s it…

I hope you find some useful information here for your Camino trip, if you have any questions I’d be delighted to help you out. Feel free to pop into the shop or send us an email and we’ll get back to you.

Remember as well, you’ll come across lots of shops over there where you can buy anything you’ve forgotten to bring.

Buen Camino!

Buen Camino!